The Tree Spirit, fun tutorial by me Kat Hazelton.
Hi everyone, well things have been rather serious on my blog lately so I thought it time to interject some fun. So here is a little easy but fun 'Kat make' tutorial.
I have always been fascinated by trees and the folklore surrounding tree spirits. When I go out and about I often see faces in trees so I thought it would be fun to do a little Tree Spirit project, more known nowadays as Tree Ents thanks to Tolkien's tales of Middle-earth. You will often see Tree Spirits whilst walking in ancient woodlands. Old trees with what appears to be eyes, noses and some even have mouths! Some with complete faces others just a hint of a winking eye! Be polite to them as some of them are very old and sometimes not too keen on humans! But if you don't walk in old woodlands keep an eye out whilst in local parks and even carparks where you will find younger Tree Spirits! They are often Birch trees and are much more friendly!
So for those of you who will be venturing out on adventures this summer time happy Tree Spirit spotting! 👀
🍂🌳🍂🌳🍂🌳🍂🌳🍂🌳🍂🌳🍂🌳🍂🌳🍂🌳🍂🌳🍂🌳


I was going to do a sinister tree but then I found these rather lovely eyes with eyelashes! So my tree spirit is more friendly.
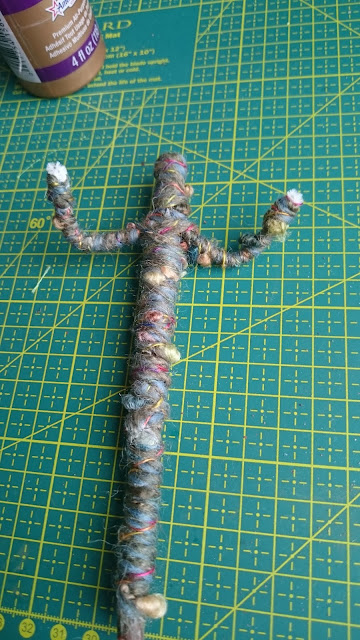
Once your eyes are glued on and set start sculpting onto your trees using sculpting paste to create a simple bark effect. I used an old paintbrush to achieve this.

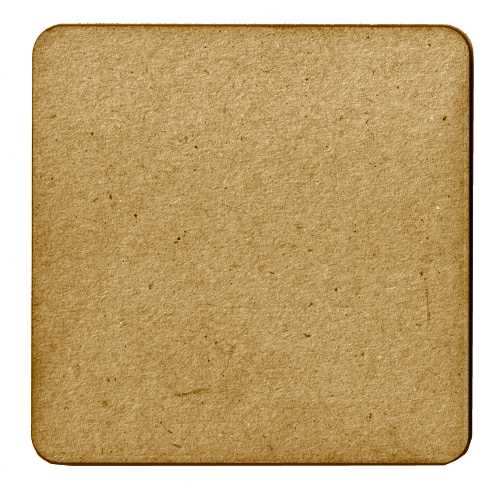
While your sculpted trees are drying, I recommend overnight, make a start on your background. I used a MDF Square beer mat. I painted the top half with black and blue acrylic paint. Then once dry I glued on some pre made inked paper. You can use coloured tissue paper or just paint it green.

Paint your trees and glue them into position. I actually removed and repositioned some of the arms of my tree to fit onto my background more neatly. MDF can be gently snapped or cut with a saw. Please be careful using a saw get help from an adult if you are a younger reader.
Then I glued on lots of details dried leaves, moss and I added a moon which was made from a glass pebble with glitter on the back. I also added a little blue glitter glue to my sky to add some twinkles!

Add a ribbon or string and your Tree Spirit is ready to hang up. For extra spookiness add some Halloween elements such as bats, ghosts, maybe an owl! Just have fun with it.

